My JVC KD-R810 Car Stereo Review

Quick take: The JVC KD-R810 is a very nice head unit and I’d recommend it to anyone looking for integrated Bluetooth support. The customizable colors are a plus and they really complete the install in my Tacoma.

JVC KD-R810 – Available at Amazon for about $130 shipped

About 4 years ago I installed a Pioneer head unit and dash kit in my 2005 Toyota Tacoma with excellent results. That stereo got stolen when my truck was broken into this summer and I needed to find a new stereo to replace it. In the 4 years since I did research into  different stereos there has been an increase in features being included in units for about the same or a bit more money. iPod, USB and Bluetooth integration are becoming ubiquitous and HD Radio tuners are even starting to be included at lower price points. One big movement coming is towards “Media Receivers” that forgo a CD player completely and are really designed around using an iPod, phone or USB drive exclusively.

Bluetooth: My only Bluetooth experience has been in our Jetta Sportwagen. As far as I know you can only receive calls on that unit and initiate calls from the phone since there is no phonebook support. The JVC KD-R810 does have support for a manual phonebook and can access your phone’s recent received/dialed/missed calls. I mounted the external mic directly below the stereo in my dash kit’s pocket. My wife said I sounded fine the few times we’ve used it so far. Units with the mic built into the faceplate of the stereo have received marginal reviews on Amazon so the external mic was a plus in my book. I also tested streaming music from Pandora on my phone to the unit over BT and it worked flawlessly.

iPod Connectivity: The unit has worked great with my 5th generation iPod. Compared to the factory media interface in our Jetta, the JVC is vastly superior. Browsing is easier with the knob and loading is nearly instant. Spin the knob quickly and it will go into a fast seek mode much like the iPod does allowing you to skip quickly through a long list of items.

Color Customization: One other big selling point was the ability to customize the display’s colors. My Tacoma’s dash has an orange/red backlight across all of the controls and aftermarket head units like to use bright alternative colors that clash. The button lights and display can be set to different colors for day, night and menu use. One of the color presets matched the rest of my dash lights exactly and I set it to use that all the time.

Sound Quality: I have a pretty good ear for audio and dialing in an EQ. This unit was much easier to dial in than my previous Pioneer unit. Not sure if it has more power, but it just needed a healthy boost at 50hz and small cut at 1khz. It is very clear and pumps out more than enough low end with my stock speakers. The unit does have a Burr-Brown 24-bit DAC which is a step above what you’d get on a cheaper stereo.

One Con: The only con of the unit I can find is that the display is not polarized lens friendly. With my sunglasses on, the display text is almost completely filtered out. It is slightly annoying, but I shouldn’t be looking at the display when I’m driving anyways.

JVC KD-R810 – Available at Amazon for about $130 shipped
Let There Be Sound

Finally got my stolen stereo replaced in the Tacoma with a JVC KD-R810 head unit. Cost a bit more than my old unit, but for an extra $50 bucks I get built in Bluetooth and iPod/USB integration. I’ll do a full write up on it later, but I just have to say it is nice driving to work with some sort of audio entertainment.

Acura RSX Stereo Upgrade – Aftermarket Head Unit Install with Auxiliary input for iPod/MP3 player

A couple of the buttons on our Acura RSX’s stock radio were dying and I wanted an auxiliary input to plug in an iPod or other MP3 player so it was time for a replacement stereo. Compared to the install of a new radio in my 2005 Tacoma this was a cakewalk. The stock stereo is a standard single DIN size so there was no need for a dash kit or anything extra.

There were a couple things I wanted on the replacement stereo: black face and red backlighting to match the rest of the dash and a front auxiliary input for easy and cheap iPod integration. The Kenwood KDC-MP208 matched this pretty good and the price was hard to pass up, $59 shipped from one of the third party sellers at Amazon. If you are hooking an iPod up to an auxiliary input I highly suggest a cable that gives you a line level output like this Cables To Go – 4ft iPod Dock Connector to 3.5mm Cable.

Type-S Owners: If you own a Type-S with the premium stereo (no pocket, like this) you will need to get a replacement dash kit to accept either a single or double DIN aftermarket stereo. This Scosche installation kit allows for either single or double DIN and comes with the pocket if you go with a single DIN unit.

Installing Double DIN unit: If you want to install a double DIN unit then you’ll need the Ssosche kit linked above.

Head Unit: This JVC unit looks interesting as it has built in HD radio and customizable colors: JVC KD-HDR50. These units look like good matches to the RSX’s red/orange backlighting too: Kenwood KDC-MP142, Sony CDXGT430U, and Sony CDX-GT330. I got the Kenwood KDC-MP208 but it is no longer available at Amazon.

Wire Harness: Scosche HA08B Power Speaker Connector for 1998-Up Honda

Installation Steps

  1. Pull off bottom plastic dash cover that houses the power adapter plug. There are little tabs on the side to get a screwdriver in. Pop one side out and firmly work the rest of it out. It might be tough at the end, just give it a good tug straight out and it will give.
  2. Unplug power adapter to get it out of the way
  3. Using a small ratcheting wrench with 8mm socket or stubby Philips screwdriver, unscrew the two screws going up towards the stereo. They’re at a funky angle and there’s not a whole lot of room to work. Might be a good job for someone with smaller hands. I loosened the screws and backed them out by hand to avoid the risk of dropping them into the bowels of the dash.
  4. Once the screws are out the whole stereo and hazards section will slide out with a little force. Grab the back of the stereo mount through the dash and give it a real good pull. Mine had never been removed and it took some pretty good yanking to get it to budge. I used a screwdriver to pop a clip on the top right corner above the hazards switch. Slide it out a few inches and disconnect the hazards wiring harness and then the stereo’s harness.
  5. Unscrew the stock stereo from the bracket and replace it with the new unit. Plug it in with your prepared wiring harness and test to make sure everything is working. Pan to each of the channels to verify the speakers are connected correctly.
  6. Plug the hazards harness back in or your turn signals won’t work. Wonder how I know that?
  7. Slide the whole thing back into the dash while trying to keep all the new wires on top of the stereo so they don’t get smashed behind it
  8. Replace the 2 screws and pop the dash cover back on. That’s it.

rsxstereo

I’m really happy with the results. The sound on the inexpensive Kenwood unit is much better than the stock stereo. The bottom end was very lacking before, but now it is more than adequate with the stock speakers. Radio reception is good and overall this is a nice cheap way to get your MP3 player hooked up in an RSX.

My Home Theater Setup

Realized I never posted about what is normally a geek’s pride and joy, my home theater. It’s been done for over a year now and have gotten to really like it. Here’s the quick rundown:

  • 42″ 720p Panasonic Plasma (TH-42PX77U)
  • Onkyo TX-SR605 A/V Receiver
  • Toshiba HD-A2 HD-DVD player
  • AV123 X-SLS tower speakers and X-CS center speaker in Palisander Natural Satin
  • HTPC/PVR running Vista
  • Adesso Wireless RF Keyboard with Touchpad (WKB-4000US)
  • FireFly RF remote

I didn’t go the cheapest route possible, but I wanted to get the most bang for my buck. I looked for the sweet spots in terms of price and planned the system with these goals in mind:

  1. Finding a TV that met my expectations
  2. Full range speakers to avoid need for subwoofer
  3. Minimal amount of cabling
  4. Minimal living room footprint
  5. DVR and media capability

Solving Goal #1 – Choosing the right TV

There’s basically three types of HDTVs: LCD, Plasma, and rear projection. LCD viewing angles can be hit and miss, some panels perform better than others, but I find picture quality lacking. Rear projection sets also suffer from viewing angle problems. That left Plasma which also happens to produce a superb picture and was a bit of a premium when I bought it (about half the price now, but that’s typical of technology). Research and comparisons sold me on the 42″ Panasonic which has a really effective anti-glare coating and just overall spectacular picture quality.

Solving Goal #2 – Getting great sound without a subwoofer

A condo isn’t exactly an audiophile’s paradise. Low frequencies like to travel in all directions and aren’t really impeded by things like walls. Hearing bass thumping through the wall is not fun and I didn’t want to be that neighbor. I was able to rule out a lot of speakers since they wouldn’t cover enough frequencies without a subwoofer. I discovered the world of internet direct speaker manufacturers and finally decided on AV123’s X series speakers which feature real wood veneers and solidly built enclosures. I made the purchase without listening to them, but after many glowing reviews and personal testimonies I knew I wouldn’t be disappointed. They’re big, but they produce great sound, very natural and transparent with a wide soundstage.

Solving Goal #3 – Reduce cable clutter with HDMI

If you hate having lots of cables, HDMI is a dream come true. High definition video and audio over one cable helps to reduce the clutter behind your entertainment center. The Onkyo 605 has HDMI upconversion so only one cable to the TV is needed if you have non-HDMI connections. I did run an optical cable down to the receiver to get audio while watching live TV. Using a 50′ HDMI I was able to get my HTPC out of sight and prevent more clutter. How many cables did I need for the entire system including power, HDMI and speakers? 11.

Solving Goal #4 – Keeping the footprint small

We don’t have a huge living room and it would be easy to over do it. With a couch and chair the only place to put a TV stand was in the corner. I found a minimalistic corner TV stand that would accept both my receiver and center speaker and fit in the corner well. The one thing I hadn’t really anticipated was placing the speakers on the side required pulling the stand out of the corner more than I would have liked. Even with it pulled out, the system only occupies one corner of the room and doesn’t really dominate the room.

Solving Goal #5 – Serving up fun with a Home Theater PC

I took a different approach than most people do with my HTPC; I didn’t want it in my living room. First off we don’t really have space for it and trying to silence a computer can become expensive. HDMI capable video cards are pretty common now so I did some research about long HDMI runs. Turns out 50′ isn’t hard to do with a lower gauge cable. This let me keep the HTPC up in the loft where I didn’t particularly care if it was silent. The Adesso keyboard and FireFly remote are both RF based and have more than enough range.

Footnote on HD-DVD and Blu-ray

I cashed in credit card rewards for Circuit City gift cards and got my HD-DVD player for free so I don’t really mind that Blu-ray won. I don’t buy movies so my migration will be fairly painless if I ever buy a Blu-ray player. I would have had to buy an upconverting DVD player anyways and the Toshiba does a great job with standard definition discs. If prices on Blu-ray computer drives keep dropping then that might the direction I go.

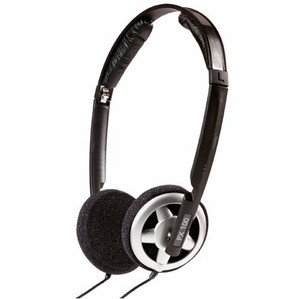
Sennheiser PX 100 Headphones Review

There’s a ton of headphone/earphone/canalphone/earbud options out on the market and it can be hard to filter through the crap and find headphones that perform well while keeping aesthetics in mind. The white earbuds that come with Ipods have become a staple on college campuses where they help complete that all important hipster look, but they don’t do much for the music you’re listening to.

A few years ago I came across the Koss SportaPro headphones and was very impressed with their sound and comfort level. I handed those down to the wife to work out with and looked for another pair to use at work (programming requires good tunes). My requirements weren’t too strict:

  • Reasonably priced (under $50)
  • Good sound quality
  • On ear pads to allow in ambient noise (to avoid startling taps on the shoulder)
  • Comfortable and easy to put on and remove

These few parameters helped eliminate a lot of products. I eventually ended up looking at the Sennheiser PX 100’s, another pair of SportaPro’s, and Grado SR60’s (pricier and bulkier than I wanted). This review at Dan’s Data finally sold me on the Sennheisers and I couldn’t be happier.

In the 2-3 years I’ve had the PX 100’s I estimate I’ve put 1500-2000 hours of music through them. The best way to describe how they sound is that they don’t sound like headphones. They’re clear and fairly detailed without being fatiguing in the high end and quite possibly pump out the perfect amount of bass. I highly recommend the Sennheiser PX 100’s if you are looking for a good moderately priced pair of cans.

Sennheiser PX 100 at Amazon